
Introduction:
The affiliate postback setup is critical for syncing conversion data with your affiliate partners or external platforms. This guide walks you through how to configure postbacks in 24Metrics, covering URL setup, firing rules, and advanced options like delay and rejection filters, so you can ensure accurate and timely conversion reporting.
Setup Steps
- Open the Postbacks section from the main menu
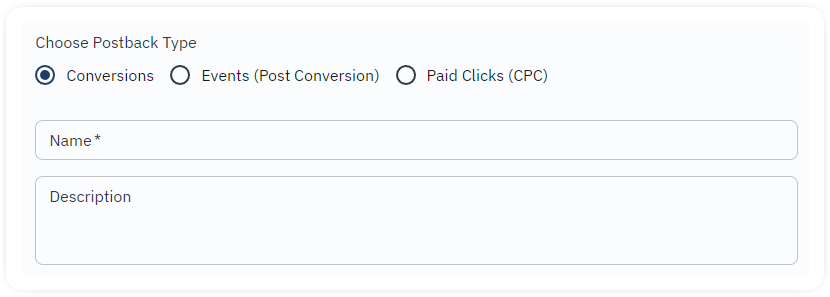
- Click +Create (by Default, “Conversion” is pre-selected)
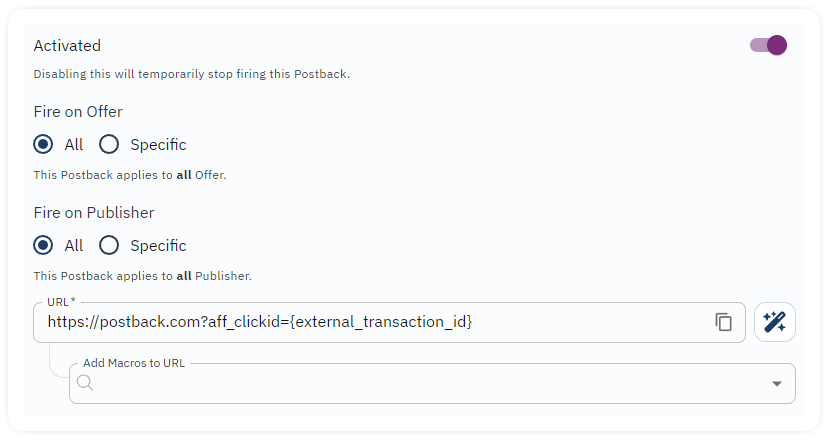
- Name your postback and decide: apply it to all offers/publishers or select specific ones.
- Enter your target URL and map parameters.
Always include the affiliate’s CLICKID, 24Metrics recommends using the dedicated parameter external_transaction_id for consistency.
URL Mapping
24Metrics supports three types of affiliate postbacks:
- click
- conversion
- post-conversion events (like upsells or refunds).
Each can be mapped with a flexible set of parameters, including {status}, {rejection_reason}, {external_transaction_id}, and others. These macros dynamically insert values when the postback fires.
Important:
Every postback must include the affiliate’s unique conversion identifier, usually a clickid. This is how the affiliate network matches the conversion to the original click. If your tracking link includes a parameter like &external_transaction_id=AFFILI_CLICKID, then your postback should use that same macro to return the value.
Essential fields: clickid (or its alias), plus optional macros like {status}, {rejection_reason}, {external_transaction_id}.
Example format:
https://affiliate-postback.com/?clickid={external_transaction_id}
You can append more parameters (e.g., payout, status, or rejection reason) using the “Add MACROS to URL” field in the postback setup. Always double-check with your affiliate what macro format they expect—naming mismatches will break tracking.
Firing Conditions
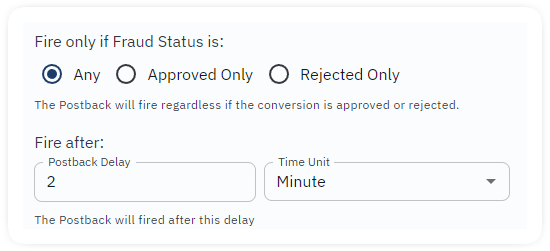
Choose when the postback fires:
- On any conversion (both approved and rejected)
- Only on approved conversions (recommended)
- Only on rejected conversions
Fire by Rejection Reason
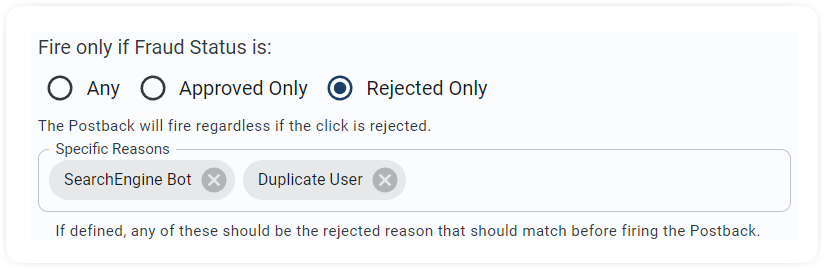
If firing on rejected conversions, you can further filter by specific rejection reasons, ensuring only relevant cases trigger the postback.
Delay Options
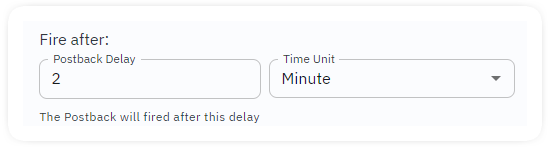
Add a delay before the postback fires to wait for external fraud-check systems (e.g., Appsflyer or internal screening). Set delays in seconds, minutes, or hours, minimum delay is 2 minutes.